Thursday, March 17, 2011

Robot - Robotz Cricut Cartridge


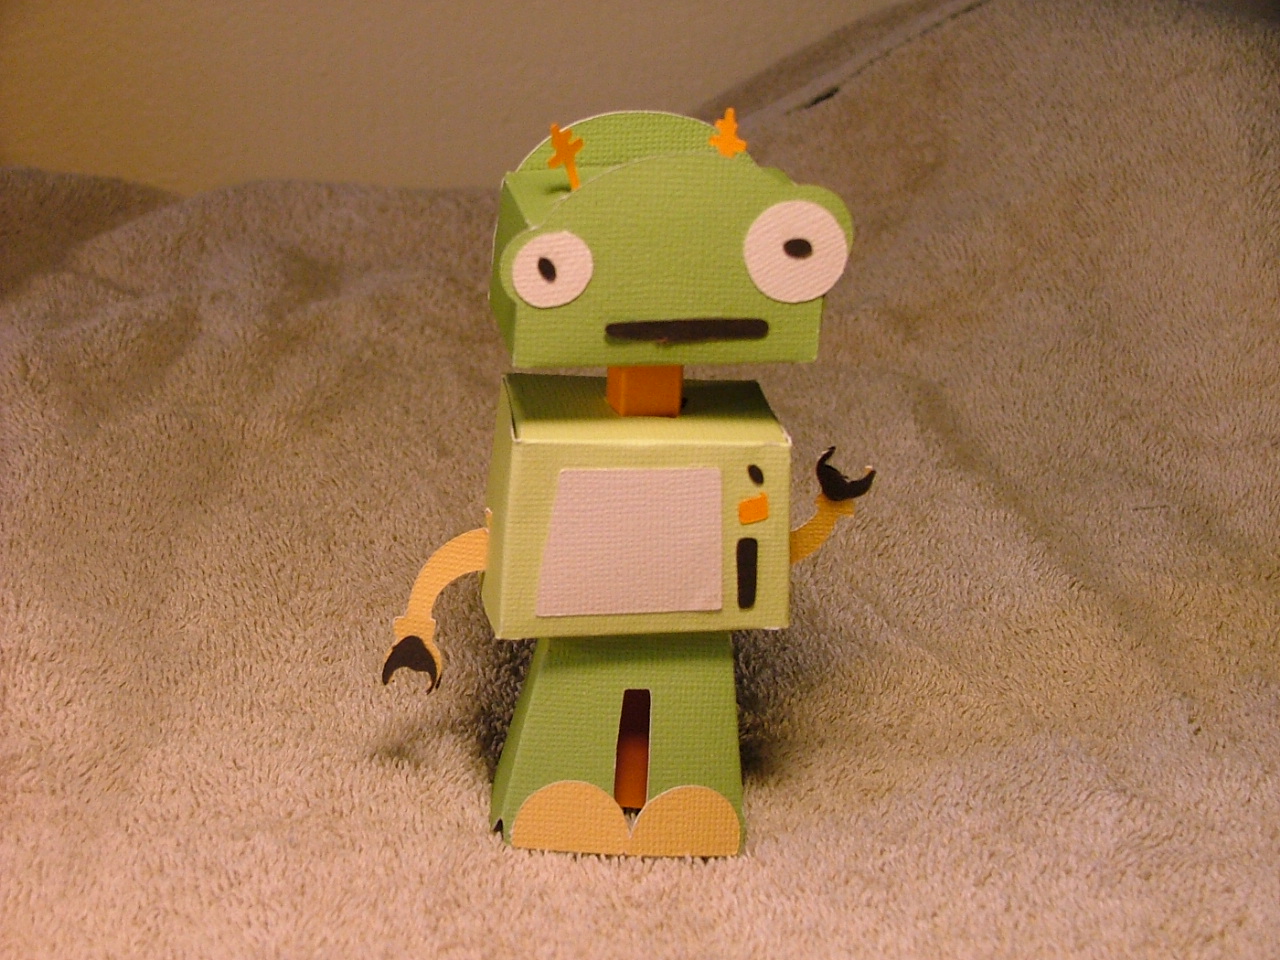
This little robot is made from the Robotz Cricut Cartridge on page 77.  This Robot is cut at 6".

I cut the following pieces:
Robot50
Robo50-s
Layer 1 (both lower and upper cuts)
Layer 2/Shadow (both lower and upper cuts)
Retro Botz (both lower and upper cuts)

All you have to do is make the folds on each piece (cricut cuts marks on where to fold), glue all the pieces together and assemble according to the picture.

You can make the robots at any size. I previously made a very large one and then made this smaller robot. They are both adorable, but the little one is just too cute.

This cartridge gives you several robots to assemble, as well as robots to put on cards or scrapbooks. Very cute!!  I will tell you that some of the robots you assemble are harder to figure out than others. We had extra pieces left on the large robot we made because we could not figure out where they were suppose to be glued.  The robot on this page was very easy to assemble and I used all the pieces.

Wednesday, March 9, 2011

Glass Etching - Animal Kingdom Cricut Cartridge

GLASS ETCHING


This glass was made using Armour Glass Etching Cream and the Animal Kingdom Cartridge.
Cut your frog on the cricut using vinyl, at 2 1/4" in height.
Weed out the pieces you will not be needing (use the negative).
Save the small round pieces for the eyes and on the body.
Cut a small strip out of vinyl for the mouth.
Apply the transfer paper to the front of the negative by peeling apart the transfer paper and placing the sticky side of the paper on top of the frog.
Peel the backing off of the vinyl.
The top of the frog is 3/4" from the top of the glass.
Place the vinyl on the glass and make sure to get all of the bubbles out of the vinyl close to the edges of the frog that will be etched.
Place the eyes, mouth and bodies small round pieces of vinyl on the glass if you don't have them already on the transfer sheet.
Apply a generous amount of etching cream and leave on for 15 minutes.
After the 15 minutes put the glass under warm running water and quickly get all of the etching cream off and then pull the vinyl off of the glass.
Dry the glass and you have an etched glass.
You can use any figures for your etching.
I use a permanent marker to mark where I want to place the figure on the glass. Permanent markers will wash off of glass.
You can check other glass etching projects I have done earlier on my blog.
You can fill your glass with candy, tea's or any other goodies you would like. Tie a ribbon on your glass and you have a nice gift for weddings, birthdays, thank you's, etc.
Have fun!


Glass Etching - Blackletter Cricut Cartridge


This glass was etched using Armour Glass Etching Cream and the Blackletter Cricut Cartridge.
 The lettering is 2.245" wide and 1.157" high.
Weed out the pieces you will not be needing (use the negative).
Apply the transfer paper to the front of the negative by peeling apart the transfer paper and placing the sticky side of the paper on top of the word Ervin.
Peel the backing off of the vinyl.
The top of the capital letter E is 3/4" from the top of the glass
The bottom of the E is 1 3/4" from the top of the glass
Place the vinyl on the glass and make sure to get all of the bubbles out of the vinyl close to the edges of the lettering that will be etched.
Apply a generous amount of etching cream and leave on for 15 minutes.
After the 15 minutes put the glass under warm running water and quickly get all of the etching cream off and pull the vinyl off of the glass.
Dry the glass and you have an etched glass.